Baking Chez Moi: Vanilla Brown Butter Weekend Cake

Well. This was an easy one. It required no special equipment, and I had all the required ingredients at home. Only butter (browned), eggs, sugar, flour, baking powder, vanilla, rum and salt. Pretty easy, right? It was.

First thing was to brown the butter. Have you browned butter yet? You should. It makes everything better, and only takes a few minutes to produce. But the flavor? More interesting, nuttier, and basically WAAAAAAY better.IMG_3645

Then whisk the eggs and sugar together. Then the vanilla, rum and heavy cream.

I used some not-quite-finished homemade vanilla extract. I’m using rum, so I measured out two tablespoons of that, and fished out a bean and scraped out the seeds. The batter ended up flecked with little black dots of the vanilla. We all know that equals extra deliciousness!

IMG_3647IMG_3651

I mixed in the flour and folded in the brown butter. And poured it into the pan. And voila! Cake!

IMG_3653

The top portion of the cake came off with the aluminum foil that I used to keep it from browning very much. That’s the bit I got to taste. I’m delivering it tomorrow for the teacher luncheon hosted by third grade. I think I’ll quarter up some strawberries and macerate them overnight with some sugar to serve along side of it. And hopefully I’ll hear good reviews from the teachers.

If the way it smells while baking is any indication, this is a delicious cake!

Want to see what other bakers from Baking Chez Moi are making? Here’s the link to see how their Vanilla Weekend Cakes came out

tap, tap. is this thing on? and pumpkin bread

ok, I know I’ve been away from this blog for a long time. My last post was December, 2013. Having three children in school really threw me for a loop. The driving. The homework. The crying. Its not that I stopped cooking–I just stopped taking pictures of it and telling you about it.

I know that my absence has been noted. Even WordPress has changed things around.  I’ll have to get used to the new editor and remember how to put pictures into this post.

And so I bring you pumpkin bread.  We love the stuff. My son, Adam, eats two pumpkin muffins for breakfast EVERY morning. Yes, every morning. And I am more than happy to supply him with that breakfast. I like this recipe because it calls for oil and not butter. I like that because if I decide to make pumpkin bread RIGHT NOW, I can, and not have to wait for the butter to soften.

IMG_3239        IMG_3238

The muffins (or loaves) freeze beautifully, so don’t worry that you can’t use several dozen muffins before they go bad. Stick ’em in the freezer and defrost as you need them. I take a few out at night and in the morning they look like they just came out of the oven.

IMG_3244       IMG_3243

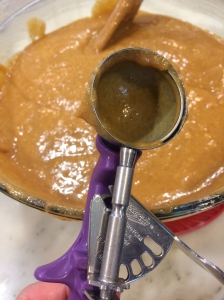
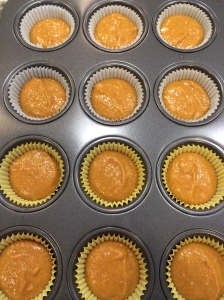
I hate it when I get batter on my muffin pans, and I also hate when the muffins aren’t all the same size. I finally figured out if I use two scoops of batter in each muffin cup. I use the same scooper that I use for scooping cookie batter. This is the scoop I use. It’s purple. They come in tons of sizes, and I found it in my local resturant supply store. The scooper is a life saver. Also that resturant supply store is a life saver–but that is a topic for a whole other post…

Pumpkin Bread
makes about 3 dozen muffins or 3 loaves

3 cups sugar
1/2 cup oil
1/2 cup applesauce (unsweetened)
4 eggs
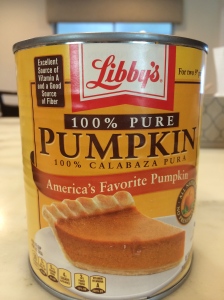
1 can pumpkin
3 cups flour (I use a mix of AP and White Whole Wheat)
2 teaspoons baking soda
1 teaspoon salt
1 tablespoon cinnamon
2 teaspoons ground ginger
1/2 teaspoon ground cloves
1 teaspoon nutmeg
1 teaspoon baking powder
3/4 cup water or milk (or a combination)

Mix sugar, oil, applesauce, eggs and pumpkin together
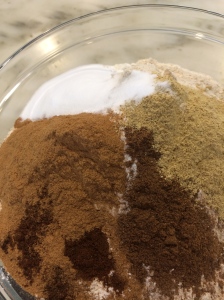
In separate bowl, mix together flour, baking soda, baking powder, salt and spices
Add the dry ingredients into the wet in three additions, alternating with the milk.
Bake at 350 for 20 minutes for muffins, or about 50 for loaves.

Good Snacking: Refrigerator Pickles

Way, way back in the winter, I met my friend Miel for lunch. She’s a delightfully wacky displaced New Yorker. And she is always doing interesting things. And this time she gave me a jar filled with her home-made refrigerator pickles.

I’d never had home-made pickles before. These are pretty low salt and low sugar. They have plenty of garlic and dill flavor, especially if they sit longer than the minimum. They take about 5 minutes to make, and need at least 4 days in the refrigerator before they’re ready to eat. Once my kids had some, they were begging me to make my own so that they could have a constant supply of pickles in the fridge.
Untitled
sea salt
Untitled ready to go hang out in the fridge for a few days Untitled
older pickles in the front, new pickles in the back.

You don’t even need official ‘canning’ jars for this. You could easily use jars from tomato sauce or even peanut butter. Don’t let a small jar collection stand in your way. I don’t see why you couldn’t do this in rubbermaid containers.

Refrigerator Pickles
Makes about 3 quarts of pickles

pickling cucumbers (kirby) enough to fill 3 quart size jars. Quartered into spears
2 cloves garlic peeled and halved for each jar (or more, if you want a more pronounced garlic flavor)
2 dill sprigs or 2 teaspoons dill seed for each jar

3 1/2 cups water
1 1/4 cups vinegar
1 Tablespoon sea salt*
1 Tablespoon sugar

place dill and garlic in each jar, and then pack with your cucumber spears
Boil vinegar, salt and sugar together and then add the water (I use a big measuring cup, and fill it with water and lots of ice to 3 1/2 cups, it cools the brine down almost imeediately
Pour the cool brine into the jars, cover and put into the refrigerator
wait 4 days until they’re ready
the garlic flavor will intensify the longer the pickles sit.

*I can’t say for sure what kind of sea salt I’m using. I took a baggie of it from my inlaws vacation kitchen. Who needs a 5 lb container of sea salt? Its a coarse rock variety. definitely not flaky. Save the flaky stuff for something else, don’t use it here!

Biscoff Oatmeal Cookies. Oh Yes. I Went There

So, back in April, David and Dorothy both participated in St. Anthony’s Triathalon. Its a huge event that pretty much shuts down most of our city for a few days. Dorothy ran the Meek and Mighty (for kids 7 and up) and David ran the full Olympic distance as he has for the last 10 years or so. In the bags that everyone got at registration we found these:
Untitled
Two of them. One in each bag. I was actually mad about it. I had successfully kept this stuff out of my kitchen until late April. And now there were two jars to contend with! Have you tried it yet? Dude….it would be trouble to keep it around. I’d be sneaking spoonfuls at every chance I got.
Untitled
But at least I read a few blogs, and some of these people have experimented with Biscoff Spread so that I didn’t have to do the work. Two Peas and Their Pod is a blog that I found recently and discovered that they have a recipe for Oatmeal/Biscoff cookies. Today was the day. I made two batches. It wasn’t dificult, I had all the ingredients in the house. I modified the recipe slightly by increasing the oatmeal and using white whole wheat flour instead of regular all purpose flour. I’ve been doing that in a lot of my baking lately. Sneaking in the healthier stuff. Right. Because this is a totally healthy recipe. Riiiiiight.
Untitled
Biscoff Oatmeal Cookies
Adapted from Two Peas and Their Pod
makes 45-50 cookies. depending on how much batter you eat

2 1/4 cups old fashioned oatmeal
1/2 cup plus 2 Tablespoons flour (I used white whole wheat)
1/2 teaspoon baking soda
1 teaspoon cinnamon
1/8 teaspoon salt
1/2 cup unsalted butter at room temperature
1/2 cup biscoff spread
1/2 cup white sugar
1/2 cup brown sugar
1 egg
1 teaspoon vanilla

Mix oatmeal, flour, baking soda, cinnamon, and salt in a small bowl and set aside
Cream together the butter, biscoff spread and sugars
Add egg and vanilla and mix thoroughly
stir in flour and oatmeal mixture.
Refrigerate for at least 30 minutes

preheat oven to 350
drop spoonfuls onto parchment-lined baking sheet and bake for 8-10 minutes
let cool on pan for 5 minutes and then remove to a cooling rack.

try not to eat them all at once.

Eating Healthy: Quinoa Salad

Do you eat quinoa? Its a south-american grain that is high in protein (9 g per cup of cooked quinoa) We eat a fair amount of it in our house, frequently serving it instead of rice.
IMG_1457This is a recipe that I adapted from a pasta salad that I think I found in Gourmet magazine many years ago. The recipe originally called for orzo, and we ate it that way (happily) for years. But last Passover it dawned on me that quinoa is K-for-P, and so I gathered my ingredients and got to cooking. Feel free to make this with orzo if you want. Its delicioius either way.IMG_1458 IMG_1460 I made mine with a mixture of white and red quinoa today because I had some red on hand. It made the salad super pretty, but it tastes the same as white, and I wouldn’t make a special trip to the store for the red stuff.
IMG_1462 Quinoa Salad
here’s another recipe that you can adapt to what you like to eat. Have great tomatoes on hand? Use ’em. Tomatoes have no flavor? Leave ’em out. Want to keep it dairy free? Don’t add the feta cheese. Its all good!

1 cup quinoa, uncooked
2 cups water or broth
cucumber, diced (use a cucumber you don’t mind eating the peel of)
scallion, sliced, white and light green parts only
grape or cherry tomatoes, cut in halves or quarters
feta cheese
salt and pepper to taste
lemon juice and olive oil as dressing

cook the quinoa in the water, fluff with a fork and let cool to room temperature before adding the vegetables and cheese if using.

cool in the refrigerator and enjoy!

Tuesdays With Dorie: Popovers

Welcome! I’m very excited to be hosting this edition of Tuesday’s With Dorie.  I have the pleasure of hosting this week with Paula of Vintage Kitchen Notes. The recipe is by Marion Cunningham, who died last month at age 90.

Before making this recipe I’d only had one opportunity to eat a popover. It was in Dallas, TX, about 9 years ago. My co-workers from the Jewish Federation took me out to lunch on one of my last days with them to the original Neiman Marcus. The resturant there serves lunch, and instead of bread, they served popovers.

The other day, my friend Caroline posted a picture on facebook of some crepes that her son Cal (age 10) had made, and I asked if he’d like to come over and make popovers with us. He did, and they came over to bake on Wednesday morning. I was pretty happy to be baking on what would have been Julia’s 100th birthday. AND I couldn’t have found an easier recipe to make with kids than this. Cal was very good at cracking eggs, but needed a lesson in the correct way to measure flour.IMG_1422
Once the batter was in the pan,
IMG_1427
and while the popovers were in the oven, Cal busied himself by making oragami hats and figures with Dorothy.IMG_1428
he made the crown at home for her, it was really super cute and thoughtful of  him.

And then….finally….the popovers were done! They really grew while they were in the oven.
IMG_1429
But, the popovers were stuck! Either the pan wasn’t buttered well enough, or my old and tired muffin tins are ready to be replaced. We got one out without any trouble, but the others required a bit more elbow grease, and got a bit mangled in the process. But it didn’t matter! They were delicious IMG_1431
I served them with butter, and the kids chose what to go with it…honey, strawberry jam or peach/bourbon/vanilla jam. I tried all three, and they were each delicious. The popovers rose amazingly high and were hollow and slightly custardy in the middle. So much fun! They only took a minute to mix up–you should make some this weekend! When I bake them again, I might add a bit of vanilla to the batter, and cut down on their total time in the oven, but not by much.

Popovers
From their name, which inspires smiles, to their puffing power, popovers have magical appeal. many of us have fond memories of the messy thrill of eating popovers dripping with butter and honey. Here’s a method that turns out beautifully puffed popovers with golden crowns, crispy crusts, and custardy interiors.

1 cup all purpose flour
1 cup whole or 2% milk, at room temperature
1/2 tsp salt
3 large eggs, at room temperature
2 Tbs unsalted butter, melted

melted butter, for greasing the popover cups (or muffin tins)

Position a rack on the lowest rung of the oven and preheat the oven to 425. Butter or spray nine 3/4-cup glass custard cups or 10 1/2-cup muffin cups. If you’re using custard cups, place them on a jelly-roll pan, leaving space between each cup. If you’re using muffin pans, you’ll need to use two 12-hole muffin tins because, to give the popovers ample air circulation, you won’t be filling all of the holes.

Pour all the ingredients into the container of a blender and whirl until smooth. (this can also be done in a food processor or in a bowl, using a rotary or hand held beater) Strain the batter if it is at all lumpy.

Baking the Popovers For the custard cups, pour 1/3 cup batter into each cup, dividing any extra batter among the cups. For the muffin cups, use 1/4 cup  of batter for each cup, filling alternate cups in each tin so that every popover has puffing space. Bake, without opening the oven door, for 25 minutes, until the popovers are puffed, nicely browned and crisp on the exterior. Turn the temperature down to 350 and bake for another 15 to 20 minutes to help dry out the interior, which, no matter what you do, will always be a little doughy in the center. (some people love this part, others pull it out) Serve immediately

Storing Popovers are at their puffiest right out of the oven. You can hold them at room temperature for a few minutes, or wrap them airtight, freeze them for up to a month, and reheat them in a 350 oven for 10 to 15 minutes, and they’ll taste good–but never as good as just baked.

note: I baked them a second time this past weekend, with a bit of vanilla–which I couldn’t taste, and less time at 350, I definitely liked that texture better, I think they were in the oven for 10 minutes at 350. I also tried buttering the tin with non-melted butter, and they still stuck. It might be time for new muffin tins. Mine are VERY beat up. Anyone want to send me Williams-Sonoma gift cards?

Insta-tzaziki

I think I was in graduate school the first time I ate tzaziki. I was hooked immediately. I even went out and bought two yogurt strainers, because 1997 was before they sold Greek yogurt, and if you wanted to make tzaziki, the first step was to strain the yogurt to make it thick. So you had to plan ahead. Not anymore. Greek yogurt makes this a super easy thing to make.

And you know how healthy Greek yogurt is, right? It is PACKED with protein! Untitled
Choose cucumbers that you don’t mind eating the peel. I like Kirby or English/hot house cukes. Grate and then squeeze as much liquid as you can from them. I put mine on a kitchen towel and twist. Untitled
Toss all the ingredients together in a bowl and stir. Its that easy. In five minutes you can have lunch. Or a dip for a party. Or a savory breakfast. It would not be difficult for me to find an excuse to eat this at every meal.
Untitled
Today I put it on a huge mound of salad greens and called it salad dressing
Untitled
Tzaziki
This isn’t a recipe as much as its a formula, you can add or subtract as you and your taste buds see fit.

Greek yogurt (I like lowfat)
Grated and drained cucumber
Lemon juice
Garlic
Salt
Pepper

Mix together in a bowl. It will last for several days in the refrigerator. If it collects some water on the top, just stir it back together. No worries!

Eating clean: Chicken with mangoes

I work out, I run, and I try to eat well. And I look pretty good–I mean, nobody’s complaining. But, I see some other women while I’m running, and think, “I want a body like that.” And I hear the answer is ‘eating clean’. So, on Tuesday I picked up two eating clean books, and immediately started flipping through, wondering what I would make for dinner with the chicken that was defrosting. I found a recipe for Chicken with Mangoes, and I happened to have several mangoes in my fridge from various friends trees. Yes, I have friends with mango trees!

I cut up 3 mangoes
Untitled
and 3 chicken breasts and some broccoli to steam separately
Untitled
and put it all together with some brown rice
Untitled

Chicken with Mangoes
Adapted from the Everything Eating Clean Cookbook
serves 4

3 boneless, skinless chicken breasts, cut into 1 inch cubes
3 mangoes, diced
olive oil
Garlic powder, chili powder, black pepper to taste (I held back because I wanted the children to eat it)
brown rice
steamed broccoli

Saute chicken until almost cooked through, add mango and sprinkle with spices

Serve with rice and broccoli

Feel proud of your first ‘clean’ meal.

easy summer dessert: key lime pie

I first tasted key lime pie when I was a kid. We came to Florida for winter break, and drove down to the Keys from Ft. Lauderdale. My mother convinced me to taste key lime pie, no small feat, I’m sure, and it was love at first taste. For the rest of the trip, we tried key lime pie at almost every place we ate–we were trying to find the best one in the Keys.

Years later, when I was living in Dallas, I discovered this recipe. I printed it out from the Food & Wine website, and its been in my recipe binder since. This was about 10 years ago. I’ve tried it with bottled key lime juice and with fresh. Take my advice, it is just as good with bottled, and you’ll save yourself a lot of pain and suffereing of juicing the teeny-tiny key limes. Unless you have a tree, or your friend with a tree gives you some, don’t be seduced by the cute little limes in the market. They’re nothing but trouble. I use Nellie and Joe’s key lime juice, and I’ve never had trouble finding it in the market.

photophoto
photophoto
The recipe includes directions to make your own crust. Do it at least once. It is ridiculously easy. And it is so much better tasting than a pre-made crust. In a pinch, I’ve used the pre made crust, but I’ve always regretted it. You don’t have to grind your own crumbs, but I ran out of pre-ground crumbs….I was lucky that I had a box of graham crackers. Use one bowl for the crust and while it bakes use the same bowl to make the filling. One bowl, one whisk, one spatula and one fork. Could it be any easier?
photo
Key Lime Pie
I’ve not changed a thing about this recipe. It is perfect.

1 1/4 cups graham cracker crumbs (about 7 oz)
1 stick unsalted butter, melted
1/4 teaspoon cinnamon
3 large egg yolks
1/4 teaspoon cream of tartar (I almost always forget to put this in)
2 14-oz cans sweetend condensed milk
2/3 cup Key lime juice

  1. Preheat the oven to 350. In a bowl, stir together the crumbs, melted butter and cinnamon. Evenly press mixture into a 9 inch pie plate. Place the pie plate on a cookie sheet and bake for about 12 minutes, until firm. Remove the crust from the oven and reduce the temperature to 325. Leave the plate on the cookie sheet.
  2. While the crust cools slightly, mix the filling in the same bowl. Whisk the egg yolks and cream of tartar until frothy. Stir in the condensed milk, and then whisk in the juice until fully encorporated.
  3. Pour the filling into the crust and bake for about 15 minutes, or until set.
  4. Cool on a rack and refrigerate once cooled.

Baking for the teachers: Triple Chocolate Espresso Brownies

Sometime last week I volunteered to make dessert for the faculty and staff at Dorothy’s school. It is teacher appreciation week and someone is bringing in lunch, and I thought, “Dessert! They must have dessert!” And then I asked how many people I’ve been baking for. 55. Fifty five people. Gulp.

I spent one evening brainstorming. And then I started baking–or rather, mixing.) I have already made several slice and bake cookies. Lemon Poppyseed CookiesWorld Peace Cookies, and Margarita Cookies (yes, they taste like a margarita. I swear.) Those are all in the freezer waiting to be sliced and baked on Monday. I have also built a small stash of eggwhites in the freezer, so I’ll be making merengues, and today I’m baking brownies. And they’ll live quite happily in the fridge until tuesday.
photo
When I was home for Passover, I stole my mother’s copy of Baking Illustrated. Its an encyclopedia of baking, by the Cooks Illustrated people, so you know you can trust the recipes.

This brownie recipe is super easy. You melt some chocolate and butter over a double boiler. Whisk up some eggs, sugar and vanilla. Add the chocolate. Then stir in the flour. That’s it. Two bowls.
photo
Chewy, Fudgy Triple-Chocolate Brownies (with espresso)
From Baking Illustrated. Makes 64 1-inch brownies

5 oz bitersweet chocolate, chopped
2 oz unsweetend chocolate, chopped
8 oz unsalted butter, cut into pieces
3 Tablespoons cocoa powder
1 1/2 Tablespoons instant espresso powder (optional)
3 eggs
1 1/4 cups sugar
2 teaspoons vanilla extract
1/2 teaspoon salt
1 cup all purpose flour

Preheat the oven to 350. Line an 8 inch baking pan with aluminum foil. spray with cooking spray

Place the chopped chocolates and butter into a glass bowl and set that over a pot of simmering water. Stir occassionally. when melted, whisk in the cocoa and espresso, if using. Let cool.

Whisk together the eggs, sugar, vanilla and salt, and then whisk in the chocolate

Stir in the flour with a wooden spoon until just combined. Pour into prepared baking dish

Bake for 35-40 minutes, until puffed slightly and a toothpick comes out with some crumbs on it. Cool on a wire rack (still in pan). Cut into 1-inch squares.

Can be wrapped in plastic and refrigerated up to 5 days. Do not cut brownies until ready to serve